Easy Kimchi Bokkeumbap Recipe
Ingredients
Method
- Squeeze the juice from 115 grams of kimchi into a liquid measuring cup before measuring the solids.
- Whisk together 1/4 cup kimchi juice, 2 teaspoons gochujang, and 1 teaspoon soy sauce until the gochujang is completely dissolved.
- Drizzle 2 teaspoons toasted sesame oil over 370 grams cooked short-grain rice and mix by hand to coat each grain and remove clumps.
- Heat 1 tablespoon vegetable oil in a frying pan over medium-high heat, then stir-fry the chopped kimchi until browned and fragrant.
- Add the rice and 1 scallion, then stir-fry while pressing down on clumps until the rice is uniform in color.
- Pour the kimchi juice mixture over the rice, increase heat to high, and stir-fry until the rice browns and the grains separate.
- Taste the kimchi bokkeumbap and season with additional soy sauce or salt if necessary.
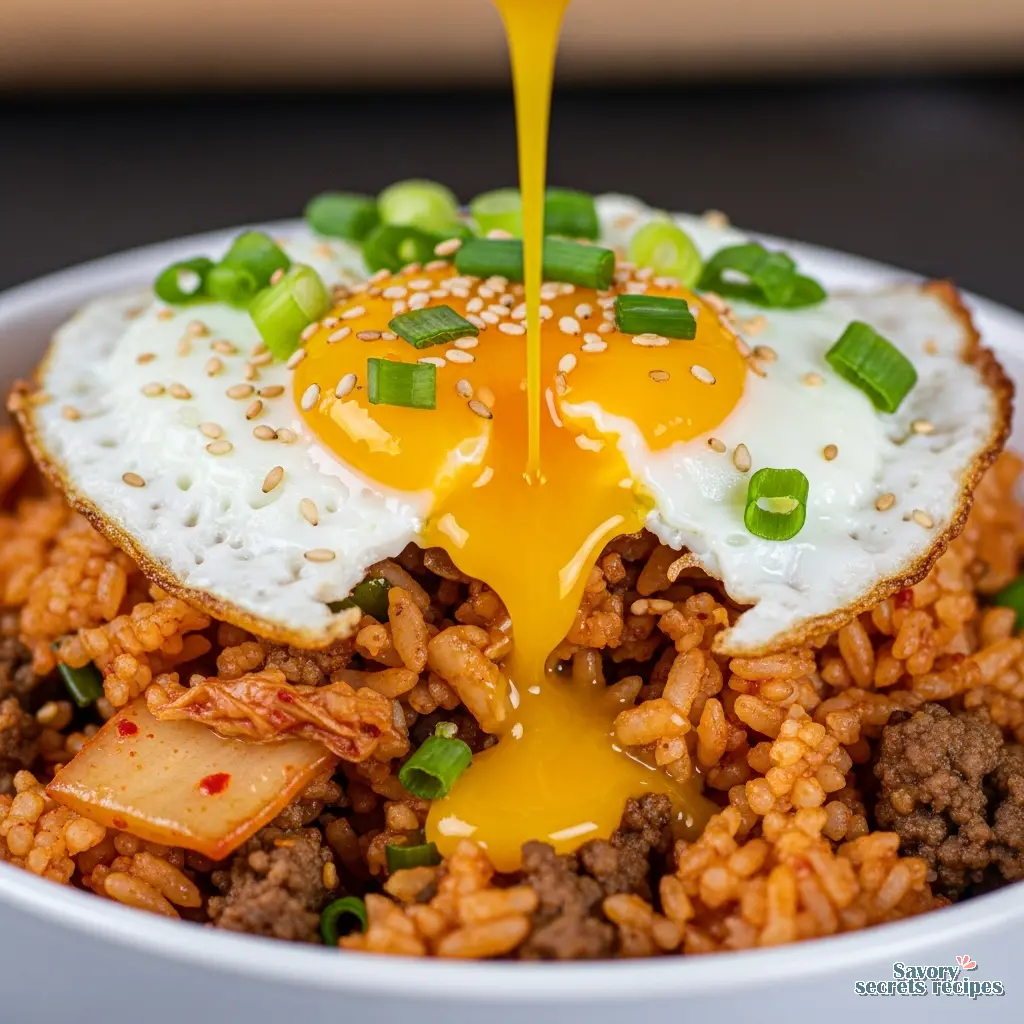
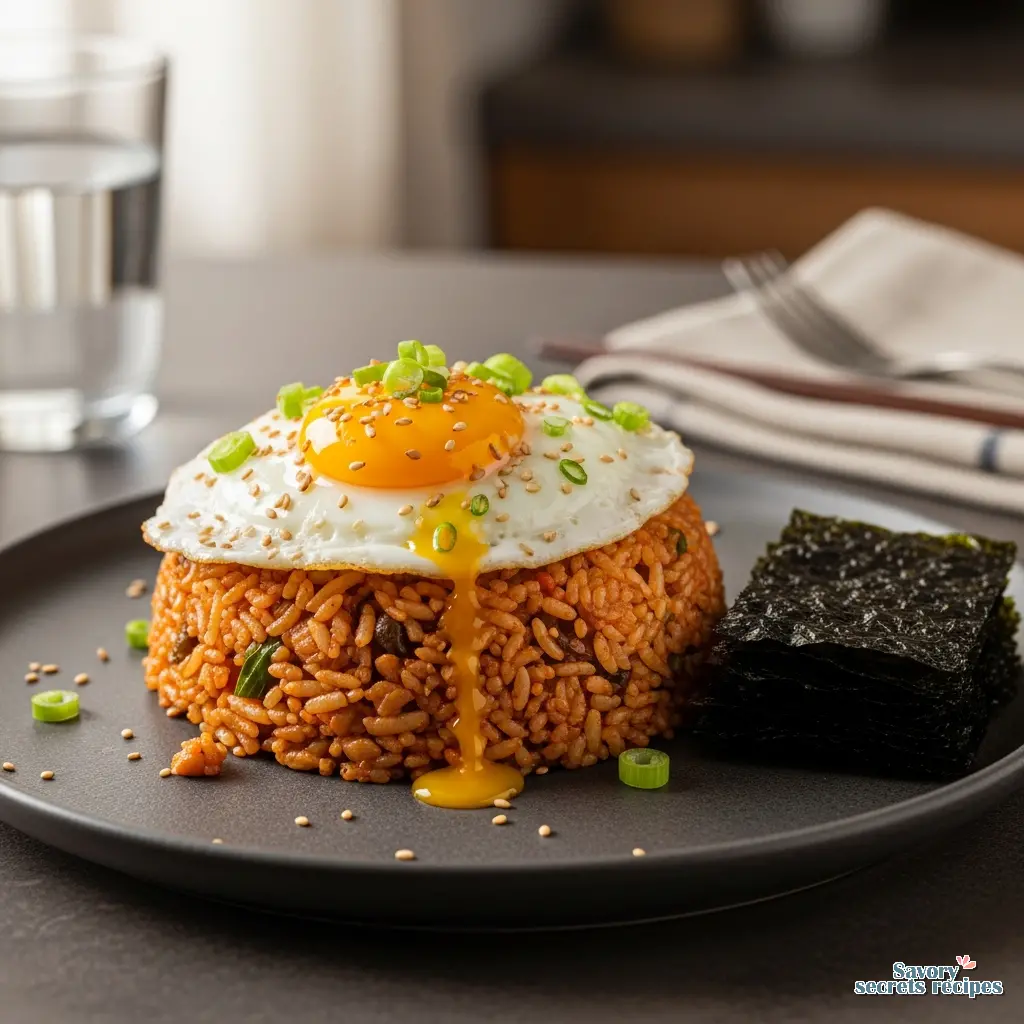
- Add the scallions, plate the fried rice, and top with two sunny-side-up eggs.
Nutrition
Notes
Why This Bokkeumbap Recipe Is a Weeknight Savior
I remember the first time I stared into my refrigerator on a Wednesday night, exhausted after a long day at the magazine, trying to figure out what to feed my family. I had a container of leftover rice that was starting to look a bit dry and a jar of kimchi that had been fermenting in the back of the fridge for weeks. It reminded me of Babcia Helena’s cellar in Milwaukee. She always said that the best food comes from things you save, not things you buy fresh. That night, I decided to trust the fermentation.
This bokkeumbap recipe isn’t just fried rice. It is a lesson in how time transforms ingredients. When you use kimchi that has been aging, you are harnessing weeks of biological activity to create flavor that you simply cannot get from fresh ingredients. It is tangy, spicy, and deeply savory. Honestly, it saved dinner that night, and it has been a staple in our rotation ever since. It takes about 20 minutes, uses one pan, and tastes like you spent hours developing the flavors. Plus, in these cooler Los Angeles winter months, standing over a hot stove for a few minutes feels pretty good. If you find yourself with an abundance of sour kimchi, you can also try a kimchi pancake recipe for a delicious and crispy snack.
The Biology of Flavor: Why Old Kimchi Matters
Let’s get a little technical for a second. The secret to a really good bokkeumbap recipe is the age of the kimchi. I would want to verify this with a pH meter to be exact, but generally speaking, as kimchi ferments, the Lactobacillus bacteria consume sugars and produce lactic acid. This drops the pH and creates that signature sour punch. This fermentation principle also applies to other varieties like white radish kimchi, which gains a deep, complex tang as it matures.
If you use fresh, new kimchi, the flavor will fall flat. It just doesn’t have the complexity yet. Fermentation is active biology, not magic. You need that acid to cut through the richness of the oil and the rice. If you check your fridge and realize your kimchi is brand new, don’t worry. I have found that adding a tablespoon of rice vinegar to the pan mimics that aged acidity perfectly. It is not exactly the same, but it is a solid workaround when you are in a pinch. While napa cabbage is the most common base, young radish kimchi is another popular choice that provides a unique, sharp texture when fried.
Rice Physics: Fresh vs. Leftover
You have probably heard that you must use day-old rice for fried rice. That tracks with what I’ve seen in my kitchen tests. When rice sits in the fridge, a process called retrogradation happens. The starch molecules crystallize and harden. This is exactly what we want. It means the grains will separate easily in the pan rather than clumping together into a mushy mess.
However, I am hesitant to say you cannot use fresh rice. If you are craving this bokkeumbap recipe and only have raw rice, just cook it with slightly less water than usual. Then, spread it out on a baking sheet and pop it in the freezer for 15 minutes. It dries out the surface moisture quickly. It is a bit of a cheat, but I have done it, and the texture holds up surprisingly well. While the rice is chilling in the freezer, you can quickly spend those 15 minutes making cucumber kimchi for a fresh side dish.
Equipment: Wok vs. Skillet
I often get asked if a wok is necessary. While a wok is traditional and allows for that smoky wok hei flavor due to the high heat, I actually prefer using a heavy cast-iron skillet for this bokkeumbap recipe at home. Here is why. Cast iron retains heat incredibly well. When you add the kimchi and rice, the temperature of the pan doesn’t drop as drastically as it might in a thin non-stick pan.
This heat retention is crucial for getting those crispy bits of rice at the bottom. If you are using a non-stick skillet, just be careful not to overcrowd the pan. You want the rice to fry, not steam. I’d probably want to test that first before recommending it, but generally, a 10-inch skillet is the minimum size for two servings.
Protein Variations (No Pork Needed)
While many traditional recipes use pork belly, I find that beef or even canned tuna works beautifully here. In fact, tuna kimchi fried rice is a massive comfort food in Korea. The savory, oily fish pairs perfectly with the sharp acid of the kimchi.
If you are using beef, I recommend ground beef or very thinly sliced ribeye. Season the raw meat with a little salt, pepper, and minced garlic before you start cooking. Cook it fully in the pan first, then remove it. This prevents it from steaming when you add the wet kimchi. For a vegetarian version, firm tofu is excellent. Just make sure to press the tofu first to remove excess water. I learned this the hard way when my first tofu attempt turned into a watery soup. Precision matters. For a heartier meal, serving this fried rice alongside a warm bowl of moo guk creates a perfect balance of temperatures and textures.
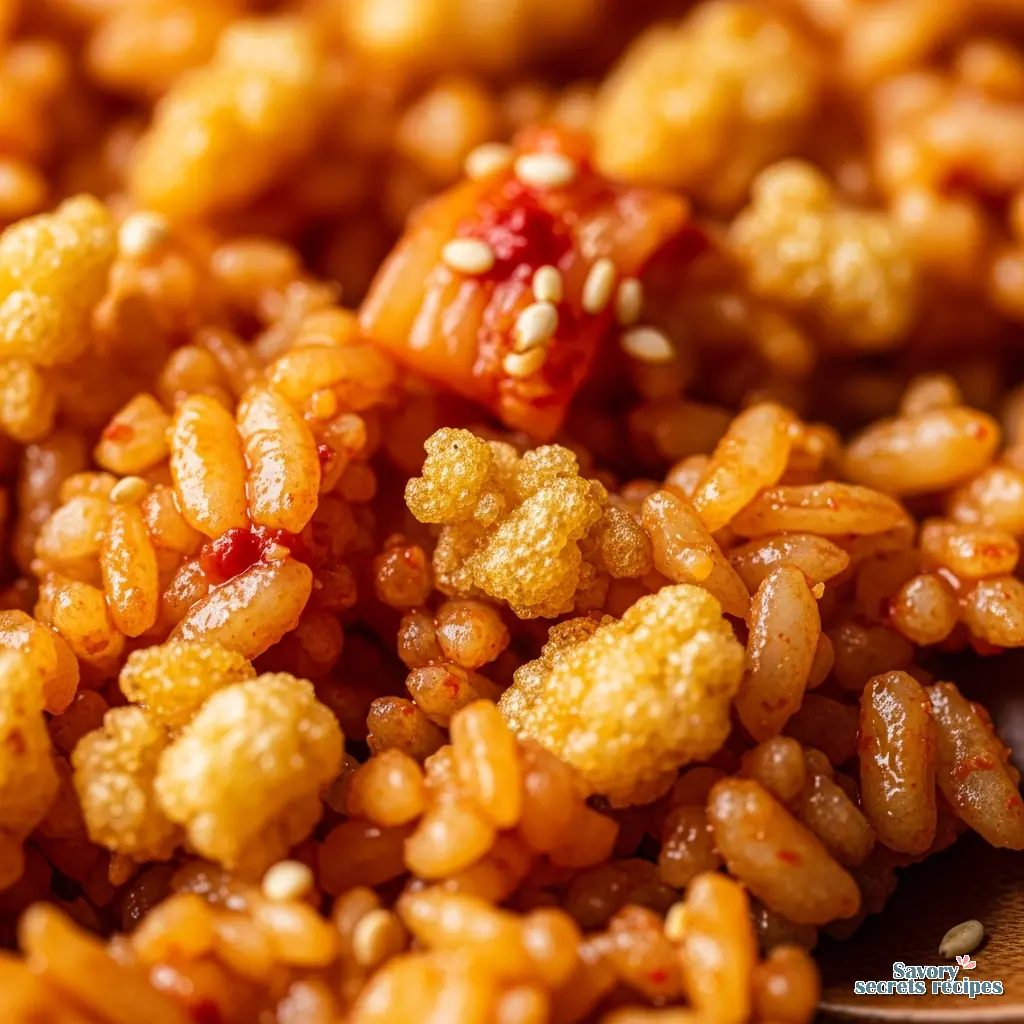
The Maillard Reaction & Nurungji
This is the part I love. The “science of the crispy rice.” In Korean, the scorched rice at the bottom of the pot is called nurungji. To achieve this in your bokkeumbap recipe, you need patience. Once everything is mixed the rice, the kimchi, the gochujang you need to press the rice down into the pan with your spatula.
Then, stop. Do not touch it. Let it sit on medium-high heat for about 2 to 3 minutes. You are looking for the Maillard reaction, where the amino acids and reducing sugars rearrange to create that distinct browned flavor and texture. You will hear it crackle. That sound is the moisture evaporating and the rice crisping. I usually lift up one edge with a spatula to check. If it is golden brown, you are good to go. If it is still pale, give it another minute. Trust your senses, but verify with your eyes.
Common Mistakes & How to Fix Them
Even with a simple dish, things can go sideways. I’ve had my share of failures. Here are a few things to watch out for so you don’t have to learn the hard way.
Mistake: The rice is mushy and clumpy.
Solution: This usually happens if you use hot, fresh rice or too much liquid. If your kimchi is very juicy, squeeze it out a bit before adding it to the pan (save the juice!). And always break up cold rice clumps with your hands before they hit the pan. It is messy, but it works.
Mistake: The dish lacks flavor.
Solution: You probably didn’t use enough kimchi juice or the kimchi was too young. Stir in a tablespoon of soy sauce and that vinegar hack I mentioned earlier. Also, make sure you are using enough oil. Fat carries flavor.
Mistake: It is too spicy to eat.
Solution: Gochujang can vary in heat levels. If you went overboard, add a little more rice to dilute it, or serve it with a plain fried egg and some roasted seaweed. The fat from the yolk helps neutralize the capsaicin burn. A side of chilled gochujang cucumber can also help cut through the heat while providing a satisfying crunch.
Storage & Safety: Handling Leftovers
As someone who obsesses over food safety, I need to mention Bacillus cereus. This is a bacteria that can grow on rice if it is left out at room temperature for too long. When you are done cooking your bokkeumbap recipe, do not leave it on the stove for hours. Cool it down quickly.
I recommend portioning leftovers into shallow airtight containers so they cool faster in the fridge. It will keep for up to 3 days. To reheat, the microwave is fine, but I prefer throwing it back in a skillet for a few minutes to revive that crispy texture. Just add a splash of water if it looks too dry. Better to err on the side of caution with rice storage.
Frequently Asked Questions
Final Thoughts
When you make this, you’ll feel like a pro. There is something deeply satisfying about taking simple, humble ingredients and transforming them into a meal that hits every sensory note crispy, spicy, savory, and comforting. It reminds me that good cooking doesn’t always mean expensive ingredients; sometimes it just means understanding how to use what you have. I’d love to see how yours turns out. For more inspiration, check out my Pinterest boards where I save all my favorite fermentation projects and quick dinner ideas.
You’ve got this now go sizzle some rice! Let me know in the comments how your bokkeumbap turned out.
Reference: Original Source
Do I really have to use day-old rice for this bokkeumbap recipe?
Ideally, yes. The retrogradation process dries out the starch, preventing mushiness. However, if you are in a rush, cook fresh rice with slightly less water, spread it on a tray, and freeze for 15 minutes. It works in a pinch.
What if my kimchi isn’t sour enough?
This is common with new jars. I recommend adding 1 teaspoon of rice vinegar or apple cider vinegar to the pan. It mimics the lactic acid produced during fermentation and balances the savory flavors perfectly.
Can I make this bokkeumbap recipe vegetarian or vegan?
Absolutely. Omit the meat and egg. Use firm tofu for protein and ensure your kimchi is vegan (some brands use shrimp paste). Sautéing mushrooms adds a great umami depth that replaces the meat flavor well.
How do I prevent the rice from sticking to the pan?
Heat control is key. Ensure your pan is hot and well-oiled before adding ingredients. If using stainless steel, wait for the oil to shimmer. With cast iron, preheat it slowly. Don’t disturb the rice constantly; let a crust form.
How do I make it less spicy for kids?
Reduce the gochujang and rinse the kimchi slightly before chopping it. You will lose some color, but the flavor remains. Adding more rice or a fried egg on top also helps dilute the heat significantly.
Can I use other types of kimchi besides napa cabbage?
Yes! Radish kimchi (kkakdugi) adds a wonderful crunch. Just chop the radishes smaller than you would cabbage so they cook evenly. I have also used green onion kimchi, which makes for a very aromatic fried rice.