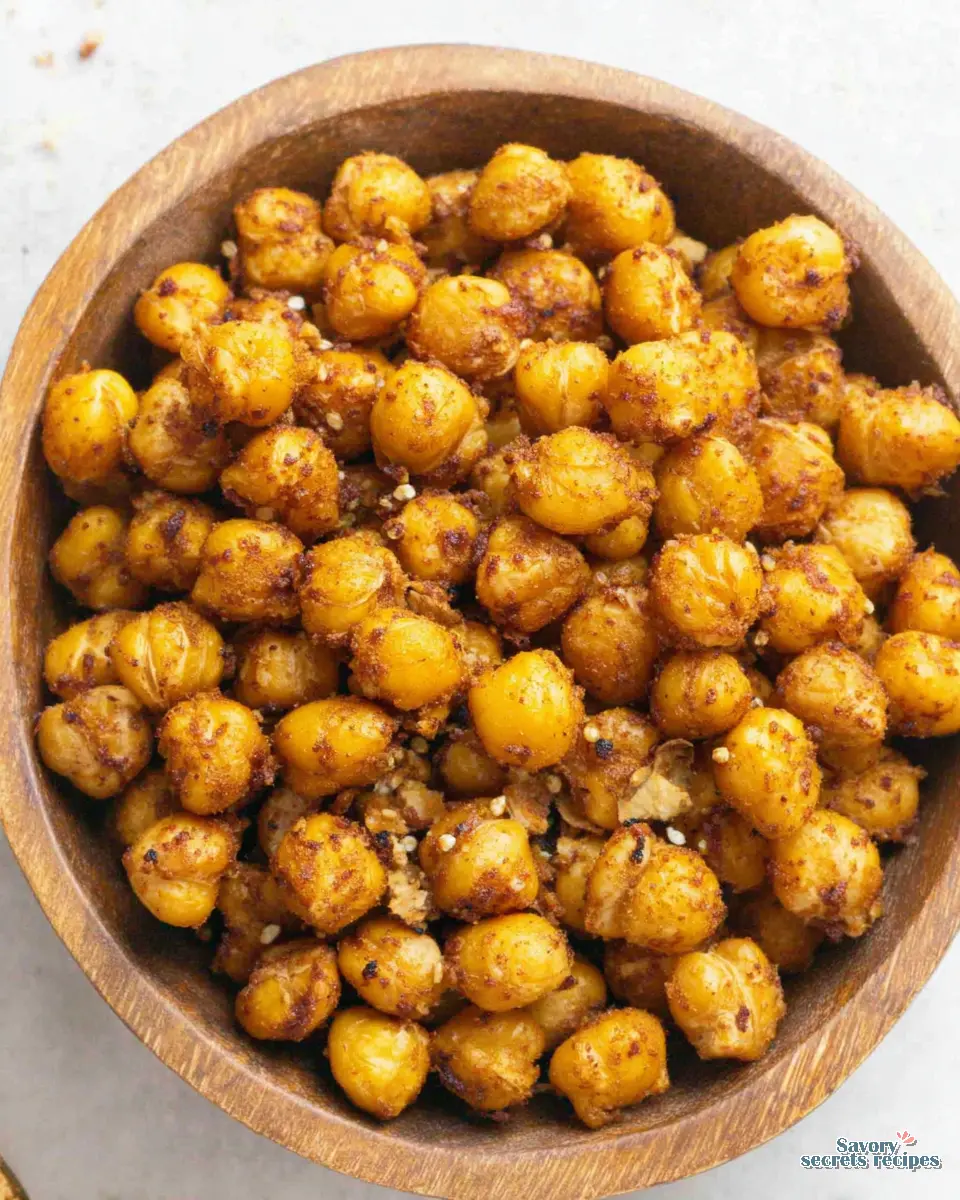
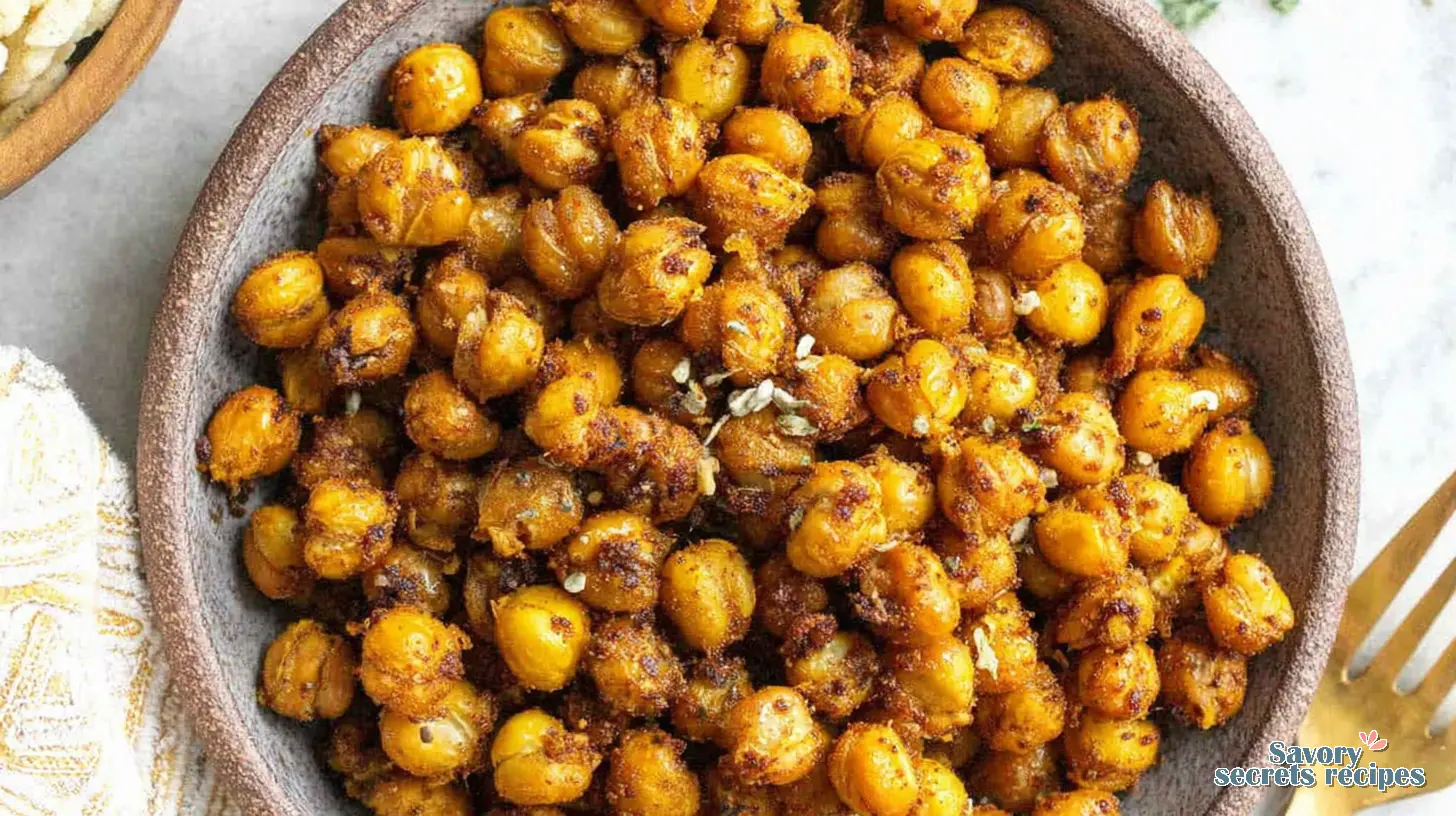
Easy Spiced Crispy Chickpea Snack Bowl
Ingredients
Method
- Preheat the oven to 400°F and line a baking sheet with parchment paper.
- Drain and rinse the chickpeas. Spread them onto a dry kitchen towel and pat them dry with a paper towel. Transfer the chickpeas to the baking sheet and spread them out. Let them sit on the baking sheet for 5-10 minutes to dry further.
- Combine chili powder, garlic powder, onion powder, cumin, salt, and pepper in a small bowl; mix well. Drizzle olive oil over the chickpeas and toss to coat. Sprinkle in the seasoning mix and toss again to coat all chickpeas evenly.
- Spread the seasoned chickpeas in a single layer on the baking sheet. Roast for 25-30 minutes, tossing and shaking the pan every 10 minutes to ensure even browning.
- Remove the cooked chickpeas from the oven. Allow them to cool on the pan for 5-10 minutes. Serve hot with a sprinkle of sea salt. Refer to the post for additional serving suggestions.
Nutrition
Notes
Why Make Crispy Chickpea Snack Bowls?
Let me walk you through this. I’ve had my share of sad, chewy chickpeas. You know the ones. You follow a recipe, wait patiently, and pull out a pan of… well, pebbles. They’re not crispy. They’re just hard. It’s disappointing, especially when you’re craving that satisfying, protein-packed crunch.
This crispy chickpea snack bowl recipe solved the problem I was having. It’s not magic, but it feels like it. Here is what I have found works, after a lot of testing in my Edison kitchen. It comes down to a few simple, careful steps. When you get them right, you end up with a snack that’s genuinely addictive, healthy, and so versatile. Worth the extra step, I promise.
Your Two Main Paths to Crispy Chickpeas
In my testing, you’ve got two reliable roads to a crispy chickpea snack bowl. The oven or the air fryer. I’ll compare them so you can pick what works for your kitchen.
The oven method is my go-to for bigger batches. It’s consistent, assuming your oven runs true. You spread the chickpeas out, they roast slowly, and you get that deep, even crisp. The air fryer is fantastic for speed and a slightly different texture. It circulates hot air so aggressively that you can get a super crunchy exterior a bit faster. One thing to watch for with the air fryer is shaking the basket. You need to do it often to avoid hot spots.
I don’t recommend pan-frying for a snack bowl. It uses more oil, splatters everywhere, and you risk some being burnt while others are still soft. To be safe, stick with dry heat. This is the part that matters.
The Non-Negotiable Steps for That Perfect Crunch
Okay, let’s get practical. These are your checkpoints. Skip one, and you might end up back in chewy chickpea territory.
First, dry those beans. I mean, really dry them. After you rinse your low-sodium chickpeas, spread them on a clean kitchen towel and roll them around. Pat them gently. You’re looking for matte, pale skins, not shiny wet ones. Any leftover water will steam in the oven, which is the enemy of crispiness. This should work, but check your specific brand. Some cans seem to have wetter beans than others.
Next, the oil. A tablespoon of olive oil or avocado oil is plenty for one can. You want a light, even coat, not a pool. Toss them in a bowl until every chickpea looks lightly glossy. The texture you are looking for here is tacky, not slippery.
Finally, space. Give them room on that baking sheet. If they’re piled on top of each other, they’ll steam. A single layer is non-negotiable. I’ll use two sheets if I’m doubling the batch. It might take an extra five minutes depending on your oven, but it’s the only way.
Seasoning for Maximum Flavor
Now for the fun part. The base spices in the recipe chili powder, garlic powder, onion powder, cumin, salt, and pepper create a classic savory backbone. It’s that flavor that reminds me of a really good taco seasoning, but simpler.
The timing here is a small secret. In my experience, though yours may differ, I add the spices after the chickpeas are coated in oil but before they go in the oven. Some folks say to add spices after roasting to avoid burning, but I’ve found that with our moderate oven temperature, toasting the spices in the oil makes the flavor deeper, more rounded. It smells incredible, like my ajji’s kitchen when something is just beginning to toast.
You’ll know it’s ready when the aroma hits you about ten minutes in. It’s warm and earthy, with a little kick from the chili powder.
Pro Tips for Extra Crispy Chickpeas
These are my little kitchen hacks. They make the difference between good and “I can’t stop eating these” crispy chickpea snack bowls.
Test it at the two-hour mark. I mean after they’ve cooled! Seriously, the true test of a crispy chickpea isn’t right out of the oven. It’s after they’ve sat for a bit. A perfectly roasted chickpea will stay crunchy at room temperature for hours. If it gets chewy quickly, they needed more time.
Don’t rush the cool down. Let them sit on the baking sheet after turning off the oven. The residual heat pulls out a bit more moisture. I just leave them in there with the door cracked open.
And about cornstarch. You might see it suggested online for extra crispiness. I’ve tested it. It creates a different kind of shell, almost like a light batter. It’s not bad, but it’s not what I’m after for this healthy crunchy chickpeas recipe. I prefer the pure, clean crunch of the chickpea itself. Worth noting.
Common Crispy Chickpea Snack Bowl Mistakes & Fixes
Mistake: Soggy or chewy chickpeas by the next day.
Solution: You likely didn’t dry them enough before roasting, or they were stored in a sealed container while still warm. Always cool completely and store loosely covered.
Mistake: Burnt spices or bitter flavor.
Solution: Your oven might run hot. Try reducing the temperature by 25°F next time. The chickpeas should be a deep golden brown, not dark brown.
Mistake: Chickpeas are popping and jumping off the pan.
Solution: That’s residual moisture exploding. It means you skipped the thorough drying step. Just be careful, they’re hot! And dry them better next time.
Crispy Chickpea Bowl Variations
Once you’ve mastered the basic crispy chickpea snack bowl, you can play. This is where you make it yours. The method stays exactly the same. Just swap the spice blend.
For a smoky vibe, use smoked paprika and a touch more garlic powder. It’s so good. For an “everything bagel” style, mix in dried onion flakes, garlic powder, poppy seeds, and sesame seeds after roasting. If you want a touch of warmth, a pinch of cayenne with the chili powder does it.
I don’t do sweet versions often, but if you want to try, toss the oiled chickpeas with a little maple syrup and cinnamon after baking. They’ll be sticky and sweet, a totally different snack. I prefer savory, but my five-year-old testing assistant Priya would disagree.
Serving Your Snack Bowl Creation
Obviously, eating them straight from the bowl is a perfect choice. But let’s talk about turning them into a meal. A crispy chickpea snack bowl becomes lunch when you pile a handful over a green salad. They’re the best gluten-free crouton you’ll ever have.
I also love them on top of a creamy soup instead of crackers. Or folded into a wrap with some veggies and a tahini sauce. They add that protein-rich snack element and a crucial textural contrast. If it looks too dry at this stage, that is normal. The chickpeas are the crunch, so you want a saucy or creamy element elsewhere in the bowl.
Storing & Reheating Your Crispy Chickpeas
This is critical. To keep your roasted chickpea crunch snack perfect, store them at room temperature. I use a loosely covered bowl, or even just a plate with a paper towel over it. Never, ever put them in the fridge in a sealed container. The moisture will make them chewy overnight.
They’re best the day you make them. But if you have leftovers, you can recrisp them. Spread them on a baking sheet and pop them in a 350°F oven for 5-7 minutes. The air fryer is even better for reheating. Two to three minutes at 375°F usually brings them right back. You will know it is ready when you hear them sizzling again.
Crispy Chickpea Snack Bowl FAQ
More Healthy Chickpea Recipes to Try
If you love the vibe of this crispy chickpea snack bowl, you might enjoy a simple chickpea salad sandwich filling, or a warm, spiced chickpea curry. They’re such a versatile, fiber-packed ingredient. I always keep a few cans from Trader Joe’s or Costco in my pantry for quick meals.
Enjoy Your Crispy Chickpea Creation!
I genuinely love the problem-solving part of this. Taking a humble can of beans and turning it into something crave-worthy and good for you. That’s a win in my book.
When you achieve that perfect, consistent crunch, you’ll have a go-to snack that feels indulgent but isn’t. Your perfect crispy chickpea snack bowl awaits. I’d love to hear how your batch turns out. For more inspiration on healthy snacks and swaps, check out my Pinterest boards where I save all my favorite ideas.
Source: Health & Nutrition Research
Why don’t my roasted chickpeas get crispy?
The number one reason is moisture. You didn’t dry the chickpeas well enough after rinsing. The second reason is overcrowding the pan. They need space for the oven’s heat to circulate and crisp them, not steam them.
Are crunchy chickpeas a healthy snack?
Yes, they’re a fantastic healthy snack idea. Chickpeas are packed with plant-based protein and fiber, which helps keep you full. Baking them with a little oil makes them a much better choice than fried chips or processed snacks.
How do I avoid gas from eating chickpeas?
Rinsing canned chickpeas very well helps remove some of the complex sugars that cause gas. Also, starting with a smaller portion and letting your body adjust can make a big difference. I was happy with how this helped in my own experience.