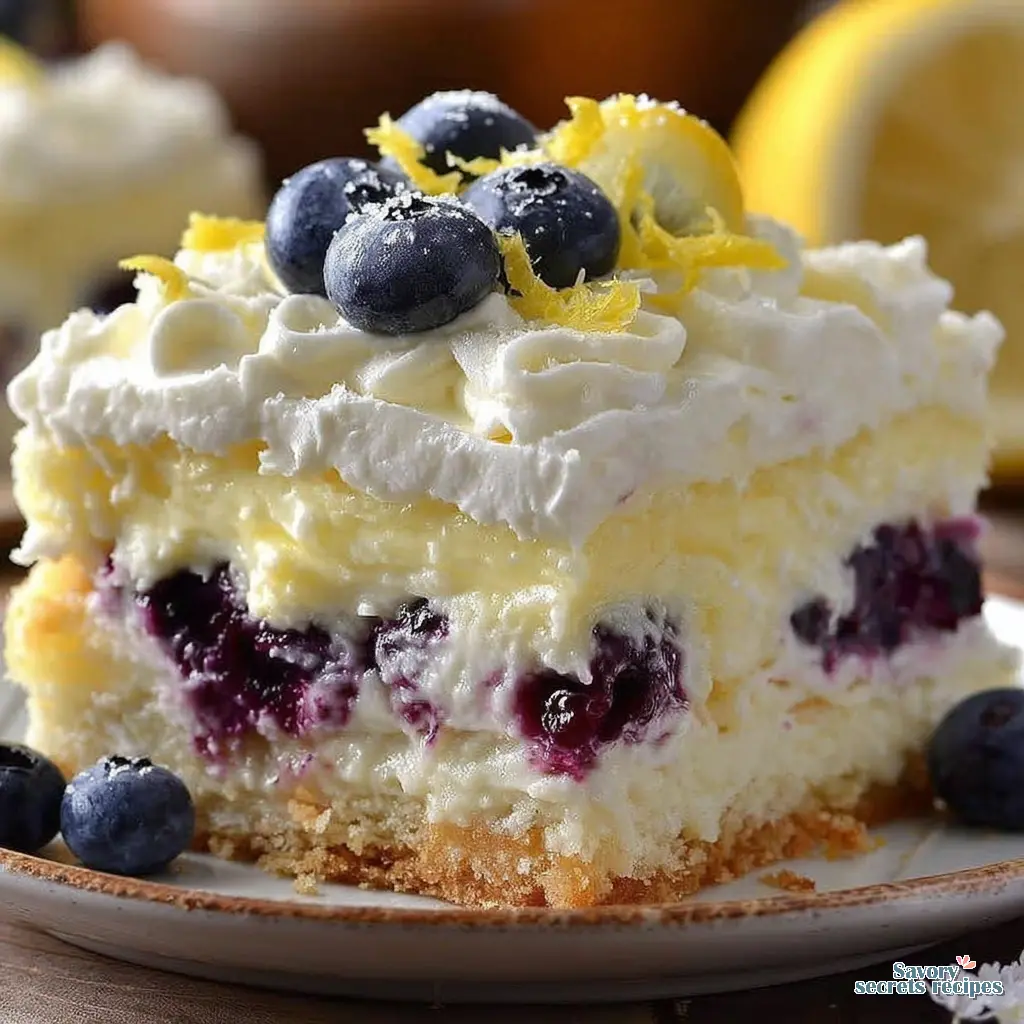
Aesthetic Korean Strawberry Shortcake Cake
Ingredients
Method
- Preheat the oven to 350°F (175°C) and grease and flour two 9-inch round cake pans.
- Combine the flour, sugar, baking powder, and salt in a large bowl. In a separate bowl, whisk the melted butter, eggs, milk, and vanilla until smooth, then stir the wet and dry ingredients together until just combined.
- Distribute the batter evenly between the prepared pans and bake for 25-30 minutes until a toothpick comes out clean. Allow the cakes to cool in the pans for 10 minutes before transferring them to wire racks.
- Slice the strawberries and toss with sugar if desired. Whip the heavy cream and powdered sugar together until stiff peaks form.
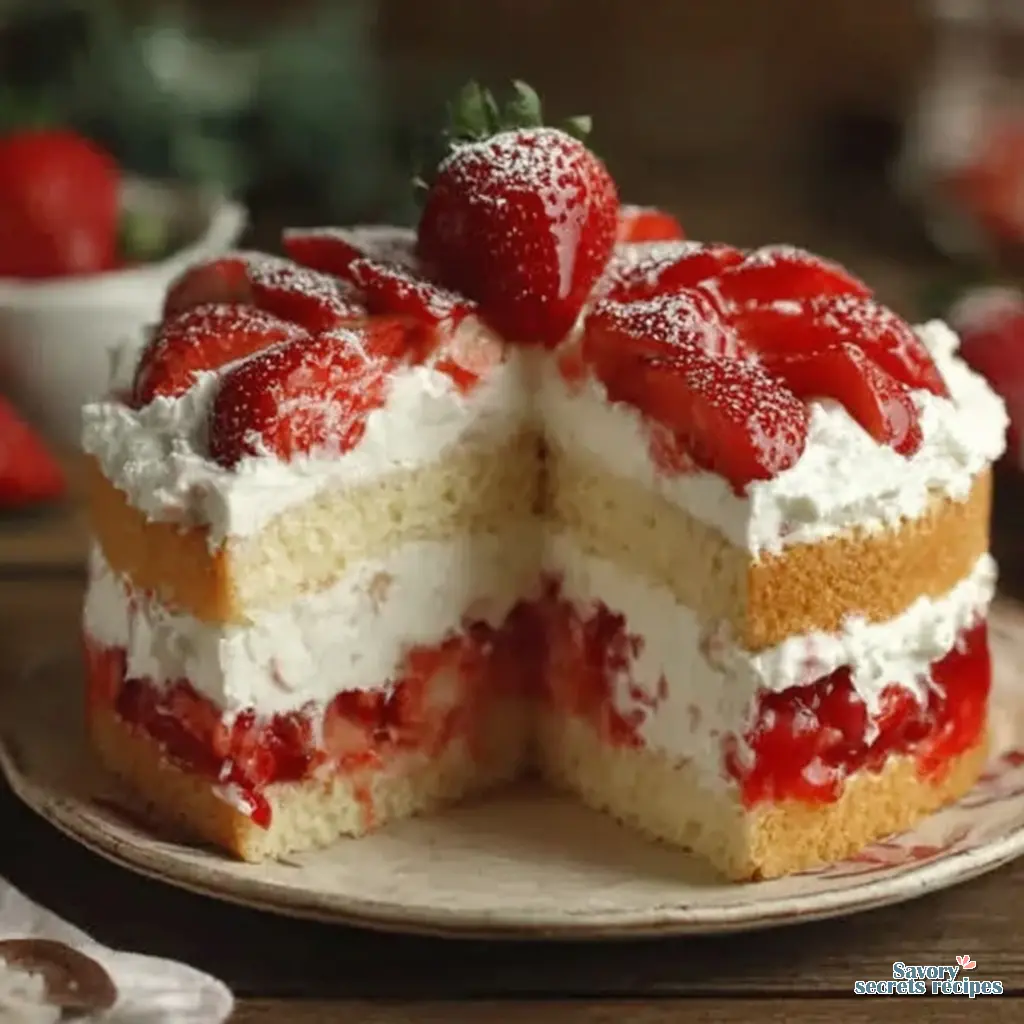
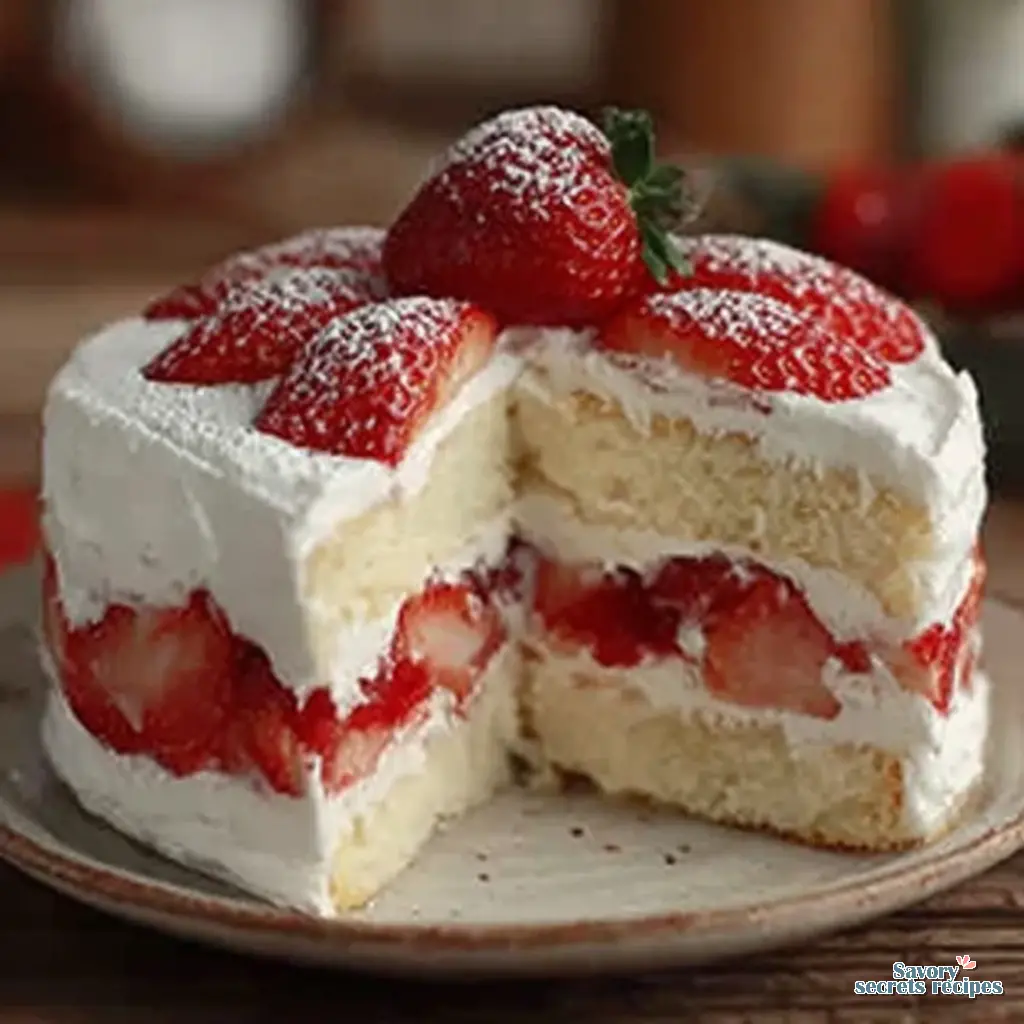
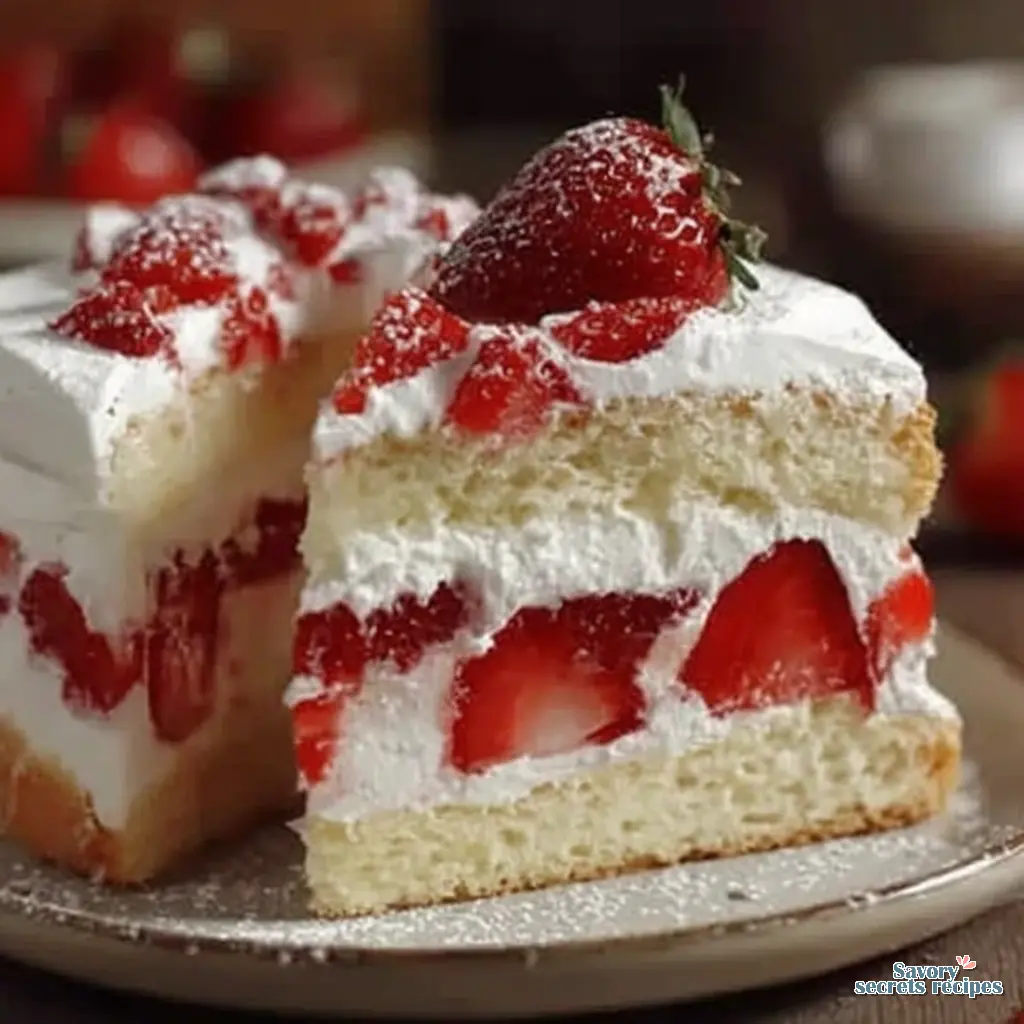
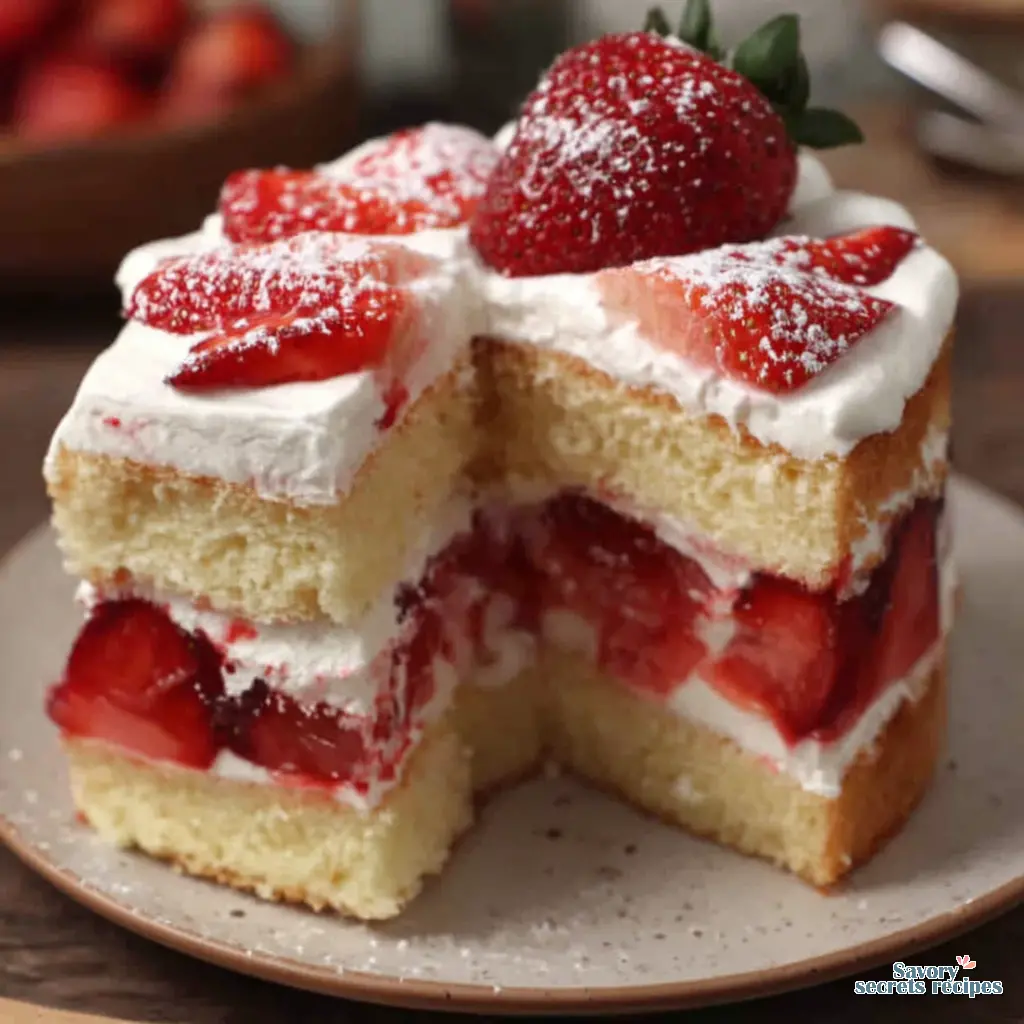
- Place one cake layer on a platter and spread half of the whipped cream and strawberries over it. Top with the second layer and finish with the remaining cream and strawberries.
Nutrition
Notes
What is a Korean Strawberry Shortcake Cake?
I remember walking into a trendy bakery in Koreatown last spring. The display case was full of these dreamy, perfectly straight cakes. A single slice of Korean Strawberry Shortcake Cake cost almost as much as my lunch. I knew I had to figure out how to make it at home. Let me walk you through this. Buying these cakes is a luxury, but making your own aesthetic cake is actually totally doable.
If you’re used to the American version, you might be expecting a dense, crumbly biscuit. The Asian cream cake style is completely different. It relies on a cloud-like genoise or chiffon sponge, layered with lightly sweetened milk cream and fresh berries. It’s incredibly light. You won’t feel weighed down after eating a slice.
I’ve tested this recipe extensively to get that signature milky flavor and vibrant red berry contrast right in your own kitchen. It brings me back to that relief I felt as a new dietitian when a patient told me my substitution suggestions actually worked in her real kitchen. I want you to feel that same success here.
Essential Cake Components
This cake looks complex, but it really just breaks down into three manageable parts. You’ve got your sponge layers, your cream, and your fresh fruit. That’s it.
The sponge needs to be sturdy enough to hold the weight of the fruit, but airy enough to melt in your mouth. The cream isn’t just regular whipped cream from a can. It’s a stabilized, slightly dense frosting that tastes like sweet strawberry milk. And the fruit? You need the best, most uniform strawberries you can find at the Santa Monica Farmers Market or your local Trader Joe’s.
I know this sounds complicated, but we’ll take it step by step. You’ll know it’s ready when you see those beautiful, clean layers.
The Secret to a Cloud-Like Sponge
My ajji never measured anything when she taught me to make dosas on a cast iron tawa. She just knew by the consistency. But for a sponge cake? Use gram measurements for precision. Volume is incredibly unreliable for this kind of baking.
The secret here is the meringue technique. You’ll want to use fresh eggs at room temperature for finer, more stable air bubbles. Ensure all bowls and beaters are 100% grease-free to avoid deflating your egg whites. Add sugar to the meringue in small increments to maintain that fragile foam structure.
Here’s what I’ve found works best. Mix your yolk batter until smooth before folding in the meringue. You absolutely must fold the meringue in three stages. Lighten the yolk batter with one-third first, then gently fold the rest to preserve aeration. Fat is the enemy of foam, so be gentle.
One critical tip. Give the cake tin a firm tap on the counter immediately after baking to prevent shrinking and deflation. This releases the trapped steam. It’s a small step, but worth the extra effort.
Visual Doneness Guide
Most recipes tell you to use a toothpick. I’ve found that’s not enough. You want to look at the edges of the pan. The cake should be pulling away very slightly from the sides. The top should spring back completely when you press it gently with your finger. If it leaves an indent, it needs more time.
Use an oven thermometer to ensure true temperature, as sponges are sensitive to heat fluctuations. This should work, assuming your oven runs true.
How to Stabilize Whipped Cream
We need a cream that won’t melt into a puddle. You’re looking for that signature Korean cafe texture. Chill the mixing bowl and whisk before whipping the cream to ensure a smooth texture. Cold tools make a massive difference.
In my testing, I add 5 to 8% mascarpone to stabilize the cream for warm weather. It gives it a richer, milkier flavor without making it taste like a cheesecake. Stop whipping the cream at soft-medium peaks. It will firm up during the frosting process. If you over-whip it now, it’ll turn grainy later.
Choosing the Best Strawberries
This is your checkpoint. The strawberries make or break the visual appeal. Look for bright red, firm berries. You’ll want to pat the strawberries completely dry after slicing to prevent the cream from becoming watery. Wet fruit will make your layers slide apart.
Step-by-Step Assembly Guide
I genuinely love the problem-solving part of this work. Assembling a tall cake can feel intimidating, but a cake turntable and a piping bag will change your life. Start by brushing your sponge layers with simple syrup to maintain moisture and help the cream adhere. We call this the cake soak.
Pipe a ring of cream around the outer edge of your first sponge layer. This acts as a dam. Arrange your whole or halved strawberries inside that ring in a tight, concentric circle. You want them packed closely so every bite has fruit.
Cover the berries with more cream, pressing down gently with your spatula to fill in any gaps. The smooth glide of the spatula here is incredibly satisfying. Place your next sponge layer on top and repeat. Keep everything chilled. If your kitchen in LA is running hot today, pop the cake in the fridge for ten minutes between layers.
The ‘Korean Bakery’ Secret
Want perfectly straight sides? That’s the hallmark of the aesthetic Korean Strawberry Shortcake Cake. Once assembled, apply a thin crumb coat of cream and chill the cake for 30 minutes. Then apply your final layer of cream.
Hold your bench scraper perfectly vertical against the side of the cake. Spin the turntable, not your hand. Let the scraper do the work. The contrast of the snowy white cream against the vibrant red berries on top is what gets you that social media ready photo.
Troubleshooting Common Baking Mistakes
Mistake: Overmixing the batter after adding flour or butter.
Solution: This deflates the air you worked so hard to whip into the eggs. Fold gently with a spatula, scraping the bottom of the bowl. Stop the moment you don’t see dry flour.
Mistake: Frosting the cake while the sponge is still slightly warm.
Solution: Your heavy whipping cream will melt instantly. The cake must be completely cool to the touch. I usually chill my layers for an hour before assembling.
Mistake: Adding too much syrup.
Solution: A cake soak is great, but drowning the sponge makes the cake soggy and unstable. Use a pastry brush and apply a light, even coat.
Mistake: The bottom of the cake is dense or gummy.
Solution: This usually means the melted butter wasn’t fully incorporated, sinking to the bottom. Next time, mix a scoop of batter into your warm butter first to lighten it, then fold that mixture back into the main bowl.
Transporting Delicate Cakes
I once brought a beautiful layered strawberry cream cake to a potluck in my neighborhood, and it slid completely off its base during the car ride. I learned this the hard way.
To be safe, always chill your finished cake for at least four hours before moving it. Use a dab of buttercream or thick condensed milk under the bottom sponge layer to glue it to the cake board. Keep your car’s AC blasting, even if it’s a cool spring morning.
Storage and Serving Tips
You’ll want to refrigerate the cake in an airtight container or a tall cake dome. The high fat content in the cream easily absorbs fridge smells, and nobody wants a cake that tastes like leftover garlic roasted veggies.
Keep it chilled until the exact moment of serving. It’s meant to be eaten cold. If you aren’t frosting the cake immediately, wrap the baked sponge layers tightly in plastic wrap. This actually improves their texture and makes them easier to slice the next day.
Frequently Asked Questions
Final Thoughts
There’s something deeply satisfying about making a Korean Strawberry Shortcake Cake that actually works on the first try. It looks fancy, but once you understand the sponge and the cream, you’ve totally got this.
Serve it cold with a warm cup of Hojicha or Genmaicha tea. The roasted notes of the tea cut right through the sweet cream perfectly. I share tons of variations on my Pinterest boards if you want ideas for different seasonal fruits. Please tag me in your photos when you make this. I love seeing your aesthetic cake wins!
Source: Nutritional Information
What makes a Korean Strawberry Shortcake Cake different from a traditional American shortcake?
The American version uses a dense, crumbly biscuit base. The Korean Strawberry Shortcake Cake uses a light, airy genoise or chiffon sponge. It’s layered with a lightly sweetened milk cream rather than heavy, sugary frosting, making it much lighter.
How do you make the signature light and airy Korean strawberry milk cream for cake?
The trick is keeping everything ice cold. I whip heavy whipping cream with a touch of condensed milk and a small amount of mascarpone for stability. Stop at soft-medium peaks so it stays cloud-like and doesn’t turn grainy.
What are some simple aesthetic strawberry cake decorating ideas for a professional look?
Use a bench scraper for perfectly straight sides. Arrange uniform strawberry halves in a tight circle on top. A light dusting of powdered sugar right before serving gives it that snowy, high-end bakery finish. Keep it minimal.
Can I assemble a layered strawberry cream cake a day before serving?
I wouldn’t recommend assembling the whole cake a full day ahead. The fresh strawberries release moisture that can make the sponge soggy. You can bake the layers a day ahead, but try to assemble it within 4-6 hours of serving.
What is the secret to keeping a sweet cream strawberry cake stable and fluffy?
Adding 5-8% mascarpone cheese to your heavy whipping cream is my favorite trick. It stabilizes the fat structure without requiring gelatin. Also, always pat your strawberries completely dry so their juices don’t break down the cream.
Why use all-purpose flour instead of cake flour?
I prefer recipes that use ingredients you already have. All-purpose flour works fine if you sift it well and fold gently. If you want a softer crumb, replace two tablespoons of AP flour with cornstarch to make a DIY cake flour.
Why bake the sponge in a water bath?
A water bath creates a humid environment in the oven. This prevents the top of the cake from drying out and cracking before the center finishes baking. It’s essential for getting that perfectly flat, even sponge layer.
How long does this cake last in the fridge?
It’s best eaten within 48 hours. After that, the strawberries start to break down and weep into the cream. Keep it in an airtight cake dome so the dairy doesn’t pick up savory odors from your refrigerator.