Best Marble Pound Cake Recipe with Butter
Ingredients
Method
- Preheat the oven to 350°F.
- Grease a 9x5-inch loaf pan, line it with parchment paper, and grease the paper as well.
- Melt 3 tablespoons of butter in the microwave in 30-second increments, then stir in the cocoa powder until well combined.
- Whisk the flour, baking powder, and salt together in a separate bowl.
- Cream the remaining 12 tablespoons of softened butter and sugar with a mixer, then beat in the eggs and vanilla.
- Gradually incorporate the flour mixture into the batter.
- Stir the milk into the batter.
- Fold half of the batter into the butter-cocoa mixture until thoroughly combined.
- Pour the chocolate batter into the prepared loaf pan.
- Spoon the yellow cake batter gently into the loaf pan over the chocolate layer.
- Swirl the batter gently with the tip of a knife for a few seconds.
- Cover the loaf pan with aluminum foil and bake for 30 minutes.
- Remove the foil and bake for an additional 30 minutes.
- Allow the cake to cool completely before removing it from the loaf pan.
Nutrition
Notes
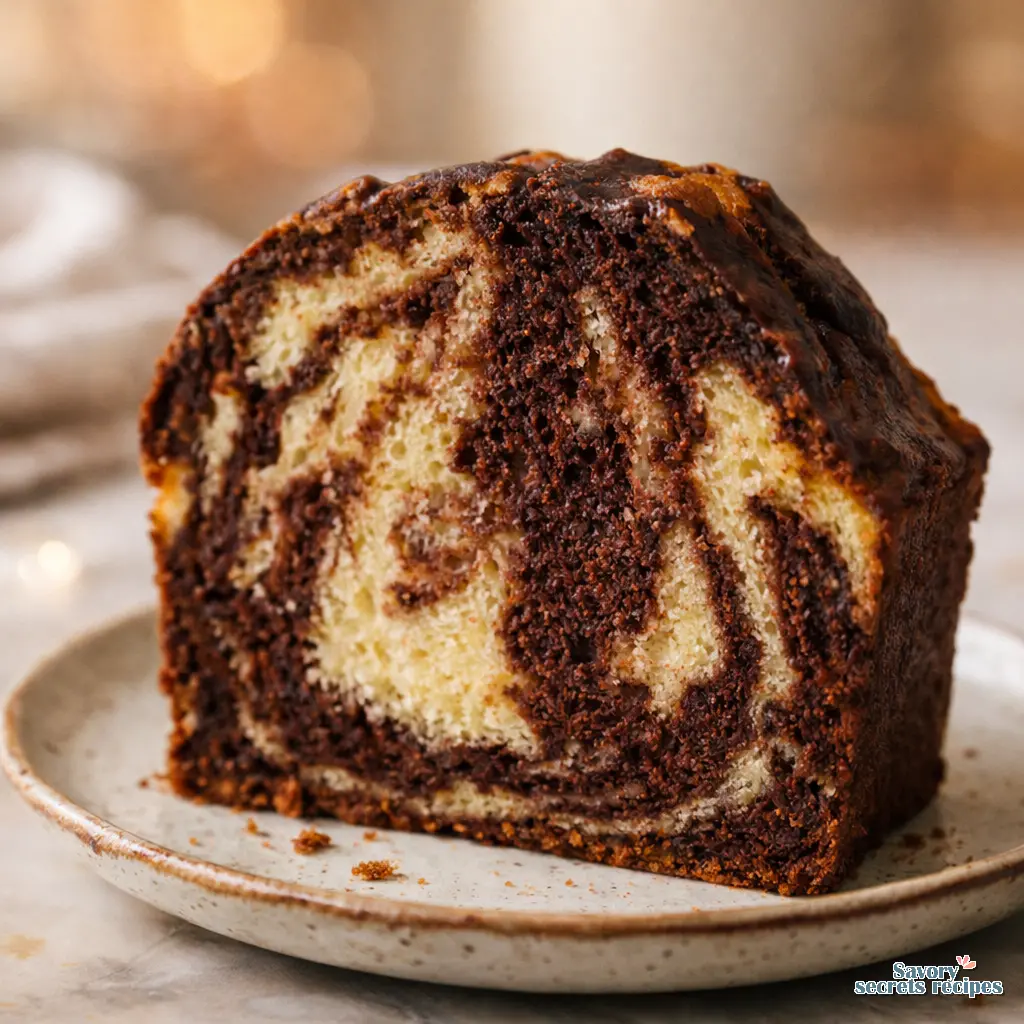
The Secret to a True Marble Pound Cake
I grew up watching my abuela tend three pots at once on a two-burner camp stove in her garage every Saturday. She never measured anything. She just tasted with the same wooden spoon all day and adjusted as she went. When I asked her how she knew when the beans were done, she looked at me like it was an obvious question. She said you just listen to them, and they will tell you when they are soft. I still listen to my beans. And honestly, I listen to my cakes, too.
Baking a traditional marble pound cake requires that exact same kind of patience. This is not a quick mix-and-dump muffin batter. A true dense cake demands attention to detail. You want that heavy, satisfying weight when you pick up a slice. You want a fine crumb that practically melts on your tongue. We are talking about a velvety texture that only comes from taking your time with the fundamentals.
I tried rushing a pound cake for my daughter’s birthday a few years ago. I used cold eggs, barely creamed the butter, and threw it in the oven. It came out dense in the wrong way, heavy like a brick, and totally flat. My family ate it to be polite, but I saw their faces. I learned my lesson. Now, I let the ingredients sit out. I let the mixer run. I let the heat do the work. If you follow these steps, you will pull a masterpiece out of your oven.
The Science of the Tender Crumb
Let us talk about the creaming method. This is where your cake actually gets its lift. Most traditional pound cakes did not even use baking powder. They relied entirely on the air trapped inside the butter during the creaming stage. We use a little baking powder here for insurance, but the butter and sugar do the heavy lifting.
You need European style butter for this. It has a higher fat content and less water, which gives you that rich, lingering flavor. Your butter must be at room temperature. Not melting, not cold and waxy, but soft enough that it yields to a gentle press of your finger. Right there. That is the sweet spot. If you use cold butter, it will not hold the air. If it is too warm, the air bubbles collapse.
Beat the butter and sugar together until it turns incredibly pale and fluffy. It usually takes about four to five minutes on medium speed. Do not rush this part. I know it seems like a long time to stand over a mixer, but trust me, it is worth it. You will see the texture change from gritty sand to something resembling smooth buttercream. That’ll work perfectly.
Common Mistakes & Fixes
Mistake: Using cold ingredients causing the batter to curdle or split.
Solution: This is a water and fat emulsion failure. Always use room temperature eggs and sour cream. If your batter splits, gently warm the outside of the bowl over a pot of simmering water for just a few seconds while mixing. It will smooth right out.
Mistake: Under-creaming the butter and sugar.
Solution: The batter will look heavy and yellow. Keep mixing until it is pale, almost white, and very fluffy. This is your primary leavening agent.
Mistake: Over-baking, leading to a dry texture.
Solution: Pound cakes continue to bake in the pan after you pull them out. Remove the cake when a few moist crumbs still cling to your cake tester.
Nailing the Visual Swirl Pattern
The magic of a marble butter cake is the contrast. You want distinct, beautiful swirls of dark chocolate against the golden vanilla base. Over-swirling is the quickest way to ruin the visual appeal. If you mix it too much, you just end up with a muddy, light brown cake. It tastes fine, but it misses the point.
First, we need to talk about the chocolate portion. We use Dutch processed cocoa here because it has a deeper color and a smoother, less acidic flavor. But if you just dump dry cocoa powder into a portion of your batter, that chocolate section will bake up dry and crumbly. You have to bloom the cocoa. Whisk it with a little warm heavy cream or water until it forms a thick, glossy paste. Then fold that paste into your separated batter. This keeps the moisture levels identical between the two batters.
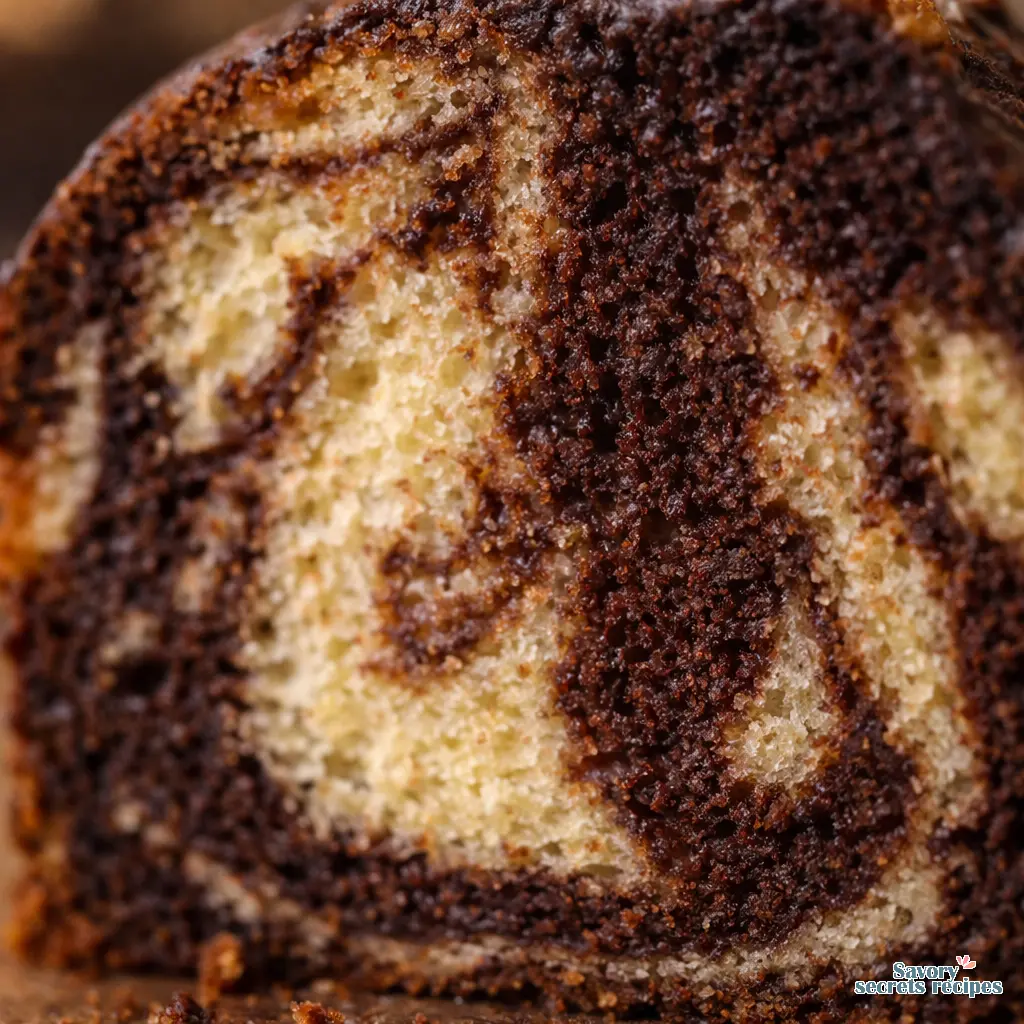
To get the perfect swirl, I use the checkerboard method. Drop alternating scoops of vanilla and chocolate batter into your prepared loaf pan. Once the pan is full, take a butter knife and run it through the batter in a figure-8 motion. Do exactly three figure-8s down the length of the pan. Stop right there. Do not go back for another pass. Let it ride. See what I mean? It feels like you should mix it more, but restraint is your best friend here.
Pan Materials and Baking: Let the Heat Do the Work
Your baking temperature and your pan material completely change how this cake bakes. I generally prefer a light-colored aluminum loaf pan. It conducts heat evenly and gives you a beautiful, golden crust without burning the edges.
If you use a dark non-stick pan, it absorbs heat much faster. Your edges will get very dark before the middle is cooked. If you only have a dark pan, drop your oven temperature by 25 degrees and keep an eye on it. If you use a glass pan, it takes longer to heat up but holds onto that heat forever. I usually avoid glass for pound cakes because it tends to dry out the exterior by the time the center finishes baking. Your mileage may vary, but light metal is solid.
Bake this low and slow. We are aiming for around 325°F. You’ll know it’s ready when the edges pull back slightly from the sides of the pan and the top has a beautiful, craggy crack down the center. If the top is getting too dark but the middle is still raw, just tent a piece of aluminum foil loosely over the top. Let the heat do the work gently. Check it with a long skewer. When it comes out with just a few moist crumbs attached, pull it out.
Make-Ahead, Storage, and Gifting Tips
A marble pound cake actually tastes better on the second day. The flavors meld, the vanilla bean paste deepens, and the crust softens just slightly as the moisture redistributes. This makes it the ultimate make-ahead recipe.
If you are gifting dessert, this is it. It travels beautifully because of its dense cake structure. It will not fall apart in a box like a delicate sponge cake would. Wrap the completely cooled cake tightly in plastic wrap, then a layer of aluminum foil. It will stay fresh at room temperature for up to three days.
If you want to stretch the shelf life, keep it wrapped and put it in the fridge for up to a week. Just make sure you bring it back to room temperature before serving. Cold butter makes the cake taste dry, even when it isn’t. You want that velvety texture to shine.
Frequently Asked Questions
Serving Your Marble Pound Cake
When it comes time to serve, use a long, sharp, serrated knife. Use a gentle sawing motion rather than pressing straight down. This protects that beautiful crust from shattering and gives you perfectly clean slicing tips for presentation. I like my slices about an inch thick. Good enough for a quick breakfast, perfect for a late-night snack.
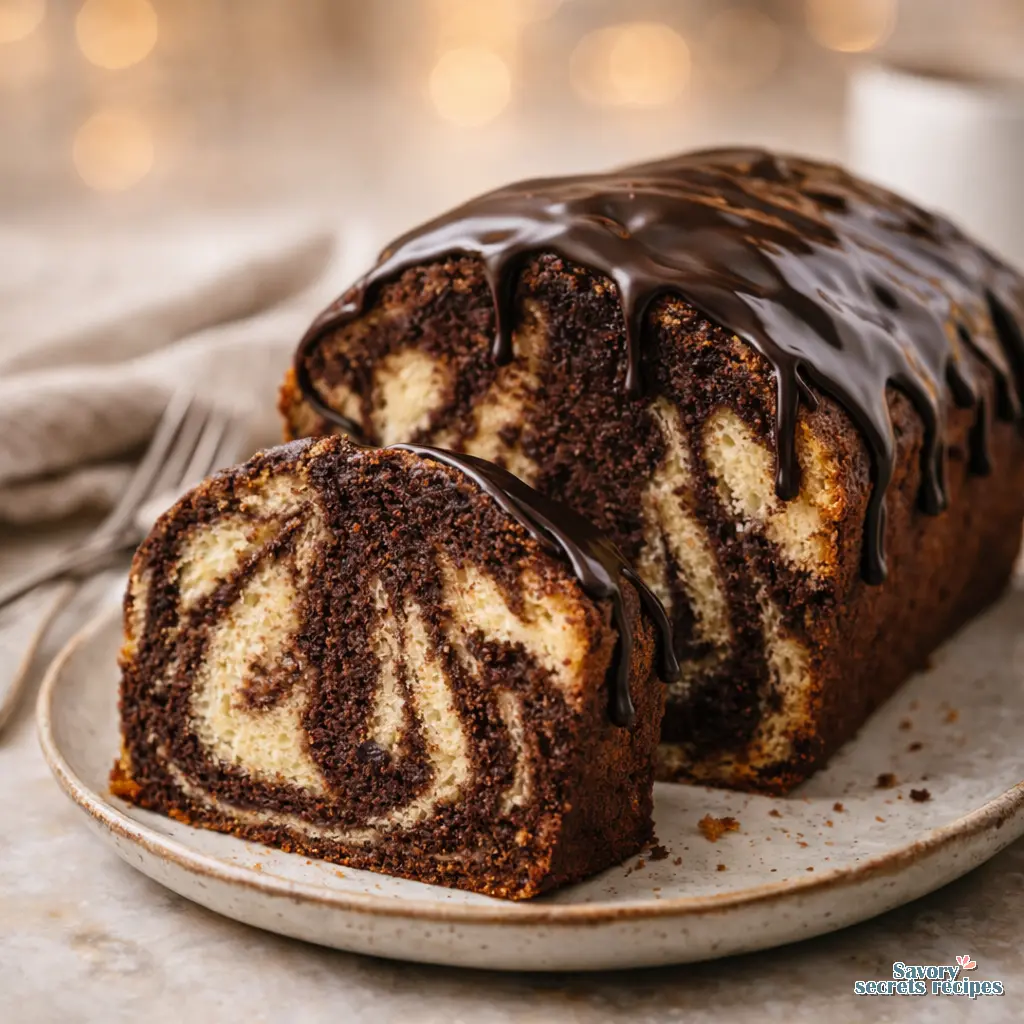
I usually serve this completely plain with a cup of dark coffee. The bitterness of the coffee cuts right through the sweet, heavy richness of the European style butter and the chocolate. If you want to dress it up for company, a simple dusting of confectioner’s sugar or a drizzle of chocolate ganache is exactly right.
Take your time with this one. Put on some music, let the butter soften properly, and let the oven do its job. For more inspiration and variations on classic baking, check out my Pinterest boards. I save all my favorite flavor combinations there.
Reference: Original Source
How to soften butter quickly for my marble pound cake?
Cut the cold butter into small cubes and spread them on a plate. Let them sit at room temperature for about 15 minutes. Never microwave it. If it melts even a little bit, it will not hold the air needed for a fine crumb.
Why do we beat pound cake batter so long?
The creaming method forces tiny air bubbles into the fat. Because a dense cake has very little chemical leavening, those air bubbles expand in the oven and provide the lift. Without a long beating time, your marble pound cake will turn out like a brick.
Can I make substitutions for this recipe?
You can swap sour cream for full-fat Greek yogurt or buttermilk. If you don’t have cake flour, use all-purpose flour but replace two tablespoons per cup with cornstarch. Just don’t mess with the sugar or butter ratios. Taste it now, adjust from there next time.
How do I know when a pound cake is done baking?
You’ll know it’s ready when the edges pull back from the pan. The top will crack, and a long wooden skewer inserted into the center should come out with just a few moist crumbs. Do not wait until the skewer is completely clean, or it will be dry.
How to make a thick chocolate ganache glaze?
Heat half a cup of heavy cream until it just simmers, then pour it over one cup of semi-sweet chocolate chips. Let it sit for five minutes, then whisk until glossy. Let it cool slightly until it thickens before pouring it over your cooled marble pound cake.
Why did my batter split?
Your batter split because you added cold eggs or cold sour cream to room-temperature butter. It breaks the emulsion. To fix it, gently warm the outside of your mixing bowl over simmering water for a few seconds while beating until it smooths out.
Why didn’t my cake rise?
Usually, this means you didn’t cream the butter and sugar long enough, or your baking powder is expired. The butter needs to be pale and fluffy before adding eggs. If your ingredients were too warm, the butter melted and couldn’t trap the air.
Why is my cake raw in the middle?
Your oven temperature might be running hot, or you used a dark pan that cooked the outside too fast. Next time, drop the baking temperature by 25 degrees. If the top browns too quickly, tent it with foil and let it keep baking until the center sets.