


Easy Shrimp Recipes: Garlic Seafood Shrimp
Ingredients
Method
- Assemble all necessary ingredients.
- Heat olive oil in a heavy skillet over high heat until it begins to smoke. Arrange shrimp in a single layer and sear for 1 minute without stirring.
- Season the shrimp with salt, then cook and stir for approximately 1 minute until they start turning pink.
- Add the garlic and red pepper flakes; cook and stir for 1 minute.
- Stir in the lemon juice, caper brine, one piece of butter, and half of the parsley, cooking for about 1 minute until the butter melts.
- Lower the heat to low and stir in the remaining three pieces of butter. Cook and stir for 2 to 3 minutes until the butter melts, the sauce thickens, and the shrimp are pink and opaque.
- Transfer the shrimp to a bowl using a slotted spoon. Continue to simmer the sauce for about 2 minutes, adding water 1 teaspoon at a time if the consistency is too thick.
- Season with salt to taste and serve the shrimp topped with the pan sauce and the remaining parsley.
Nutrition
Notes
The 5:30 PM Panic and the Visual Cure
I know that look. It’s 5:30 PM on a Tuesday, the light is fading fast, and you are staring into the refrigerator with what I call the “blank canvas stare.” You need dinner. You need it to be healthy, or at least healthy-ish. And you need it to happen before everyone in the house melts down.
This is where easy shrimp recipes save the day. I’m not just saying that. I keep a bag of frozen raw shrimp in my freezer specifically for this moment. It’s the only protein that can go from rock-hard frozen to “restaurant quality” on a plate in under twenty minutes. No other ingredient has that kind of turnaround time. Chicken? Forget it. Beef? Needs too much prep.
I remember my grandmother Elaine teaching me about composition in her garden in Pasadena. She’d say, “Maya, keep it simple. If the ingredients are good, you don’t need to clutter the frame.” That advice holds up in the kitchen too. When you strip away the fuss, you get a clean read. Just garlic, butter, lemon, and a hot pan. That’s the one.
This isn’t just about feeding people. It’s about that sigh of relief when you put a beautiful, steaming pan on the table and realize you pulled it off. Let’s build this in layers.
Sizing Matters: Why I Always Buy 16/20 Count
Let’s talk scale. In photography, scale is everything. In cooking shrimp, it’s the difference between a juicy bite and something that feels like popcorn.
You’ll see numbers on the bags like 21/25 or 31/40. That tells you how many shrimp make up a pound. The higher the number, the smaller the shrimp. I always, always reach for the **16/20 count** (extra jumbo) or at least the **21/25 count**. Here is why.
Small shrimp overcook in seconds. Literally seconds. By the time you get a good sear on one side, the inside is already rubbery. Larger shrimp give you a little grace period. They allow you to get that golden color on the outside while keeping the center tender. Plus, visually? A plate with five large, gorgeous shrimp looks infinitely more appetizing than a pile of twenty tiny ones. It’s a cleaner composition. This size is also ideal if you are following a southern fried shrimp recipe to ensure the breading gets crunchy without drying out the meat.
When you are shopping at Ralphs or Whole Foods, ignore the “fresh” counter unless you know for a fact they came off a boat that morning. Most “fresh” shrimp at the counter are just thawed frozen shrimp. You’re better off buying the bag of **frozen raw shrimp** and thawing them yourself. It’s fresher, cheaper, and gives you control.
The Thaw: The Cold Water Bowl Method
Okay, you forgot to take the shrimp out of the freezer. I’ve been there. Don’t panic. Please, whatever you do, do not microwave them. That will start cooking parts of the shrimp and leave other parts frozen. It’s a mess.
Here is the trick for a quick thaw:
Dump your frozen shrimp into a colander and run cold tap water over them for a minute to remove any ice crystals. Then, place them in a large bowl of cold water. Let them sit for 15 to 20 minutes. That’s it. Change the water once if you want to speed it up.
While they thaw, you can prep your garlic and parsley. By the time you’re done chopping, the shrimp are ready. They should be pliable and cold, not frozen stiff. Pat them dry with paper towels. This is crucial. If they are wet, they will steam instead of sear. We want a sizzle, not a sauna. This step is the most important part of learning how to make crispy shrimp with a satisfying crunch.
The Science of the Curl: Visual Cues for Doneness
My first boss, Marcus, taught me to trust my eyes over the light meter sometimes. Cooking shrimp is exactly like that. You can’t just rely on a timer because every stove is different. You have to watch the shape.
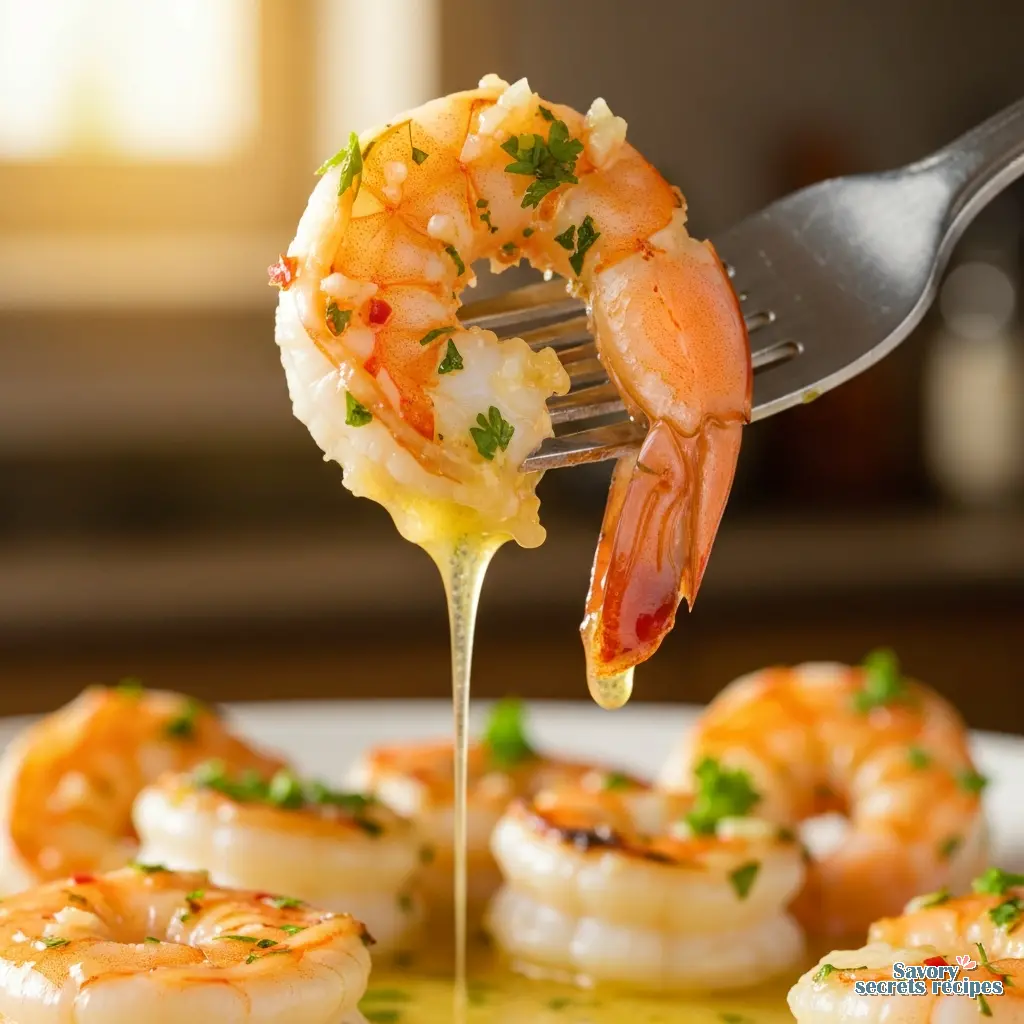
Shrimp tell you exactly when they are done by how they curl. I call it the “C vs. O” rule.
- The “C” Shape: When the shrimp curls into a loose “C” shape, it is cooked perfectly. The meat is pink and opaque, and the texture is snappy and tender. Pull it off the heat immediately.
- The “O” Shape: If the shrimp curls into a tight “O” where the tail touches the head, it is overcooked. It will be rubbery. We want to avoid the “O” at all costs.
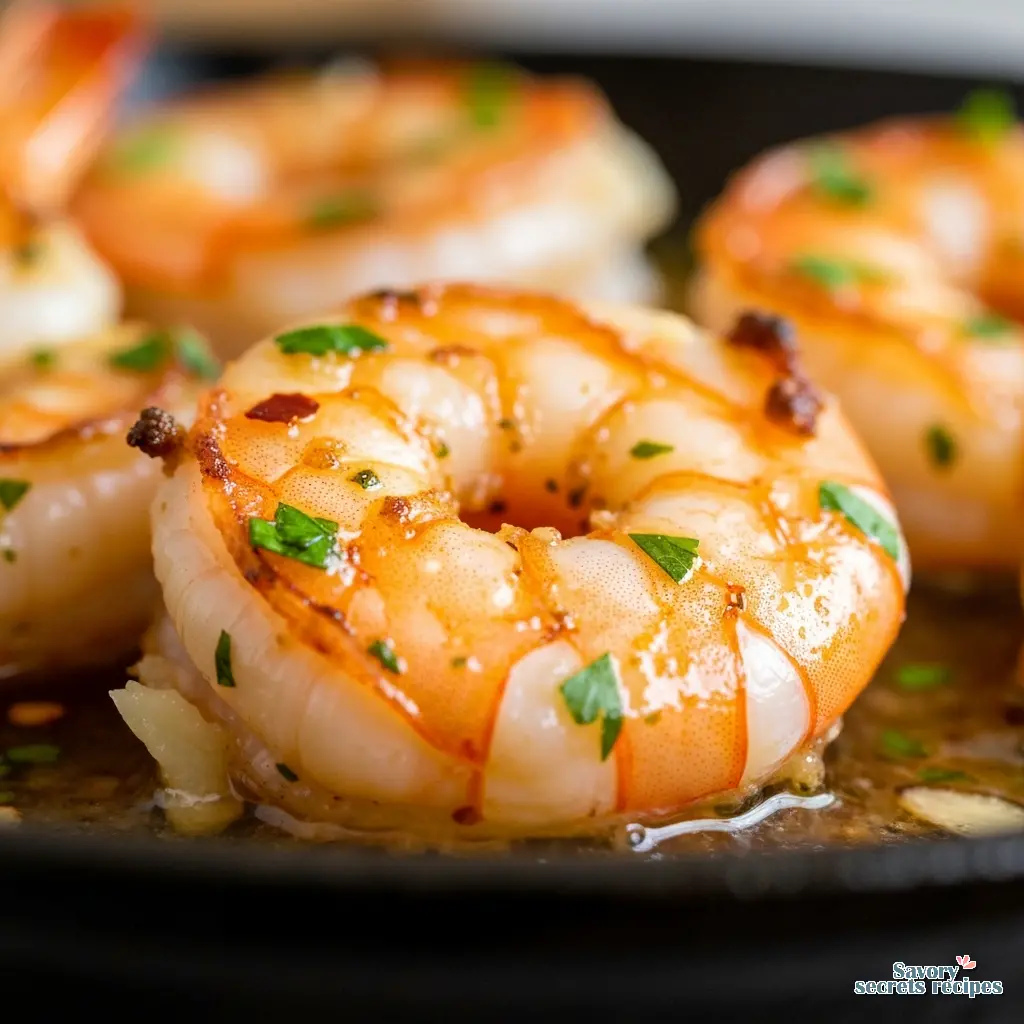
It happens fast. Usually 2 to 3 minutes per side. I like to arrange them in the skillet like a clock face, starting at 12 o’clock. By the time I place the last one at 11 o’clock, it’s usually time to flip the first one. It’s a rhythm. Keep your eye on the color. You’re looking for that shift from translucent grey to opaque pink.
Flavor Layers: Garlic, Butter, and Acid
I treat flavor like I treat a photo shoot you need a foreground, a subject, and a background. For **easy shrimp recipes**, the garlic is your punchy foreground, the shrimp is the subject, and the butter is the background that ties it all together.
A note on garlic: Please, I beg you, use fresh garlic. The stuff in the jar has a weird, metallic preservative taste that cuts through everything in a bad way. It takes thirty seconds to smash and mince a few cloves. It’s worth it. The aroma alone when it hits the pan is enough to make everyone in the house wander into the kitchen asking, “What smells so good?”
I like to use a mix of olive oil and butter. The oil prevents the butter from burning too quickly, and the butter adds that rich, velvety mouthfeel. If you are dairy-free, you can stick to just olive oil, but you’ll miss a little bit of that gloss. If you prefer a more comforting dish, cheesy shrimp is a fantastic alternative to the classic scampi style.
And finally, acid. Lemon juice is non-negotiable. It cuts the richness of the butter and brightens the whole dish. Without it, the image I mean, the flavor is too muddy. It needs that high-contrast pop. Add the lemon at the very end to keep it fresh.
Troubleshooting Texture: Mushy vs. Rubbery
Even with the best intentions, things can go sideways. I’ve had shoots where the lighting just wouldn’t cooperate, and I’ve had dinners where the shrimp texture was… off. Let’s fix it.
Texture Troubleshooting
Problem: The shrimp is mushy.
Solution: This usually means they were thawed improperly (like in the microwave) or they are old. Always thaw with cold water. Also, make sure you buy “deveined and shelled” or do it yourself thoroughly. The vein can add a gritty, mushy texture.
Problem: The shrimp is rubbery.
Solution: You overcooked them. It happens. Next time, pull them off the heat the second they turn pink. For tonight? Chop them up small and toss them with pasta or rice. The smaller pieces make the texture less noticeable. If you decide to start over, there are plenty of fried shrimp meal ideas that work well for a quick family dinner.
Problem: The sauce is watery.
Solution: You probably didn’t dry the shrimp enough before cooking. Next time, pat them bone-dry. To save it now, remove the shrimp from the pan and boil the liquid down for a minute until it thickens, then toss the shrimp back in.
Serving Suggestions: Plating for Real Life
You don’t need a food stylist to make dinner look good. My grandmother used to serve apricots on a simple white plate, and they looked like jewels. We can do the same here.
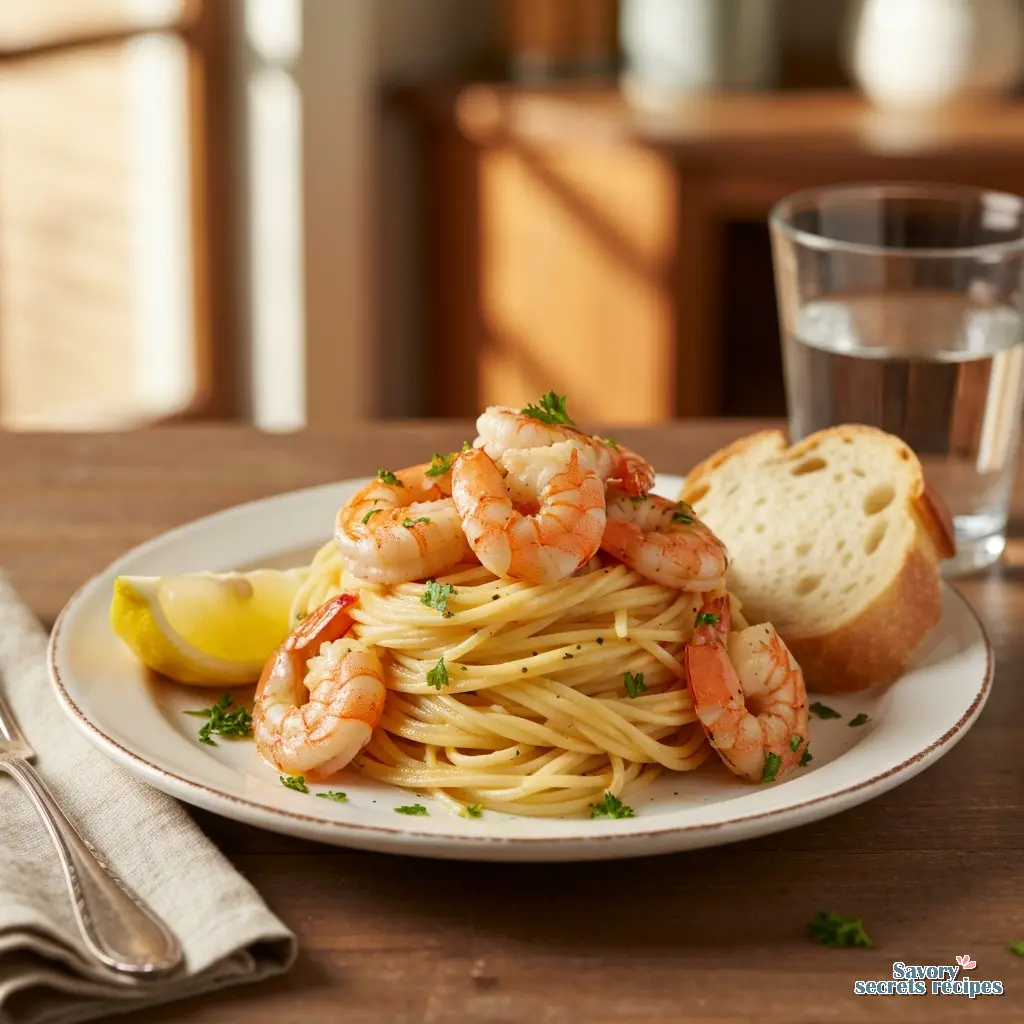
I love serving this **shrimp scampi style** over **angel hair pasta**. The thin noodles catch all that **garlic butter sauce**. But if you’re doing the low-carb thing, zucchini noodles or just a big pile of roasted asparagus works beautifully. The green of the vegetable against the pink shrimp is a classic color pairing. Good contrast. For a complete meal, try this shrimp and veggies recipe which balances flavors and nutrition in one pan.
Another favorite in our house is the “tear and dip” method. Just a big skillet of shrimp in the center of the table and a loaf of **crusty sourdough** bread. You tear off a piece of bread, dip it in the garlicky oil, grab a shrimp… it’s interactive. It’s messy in a good way. It reminds me of those long Sunday brunches with friends where we just graze for hours.
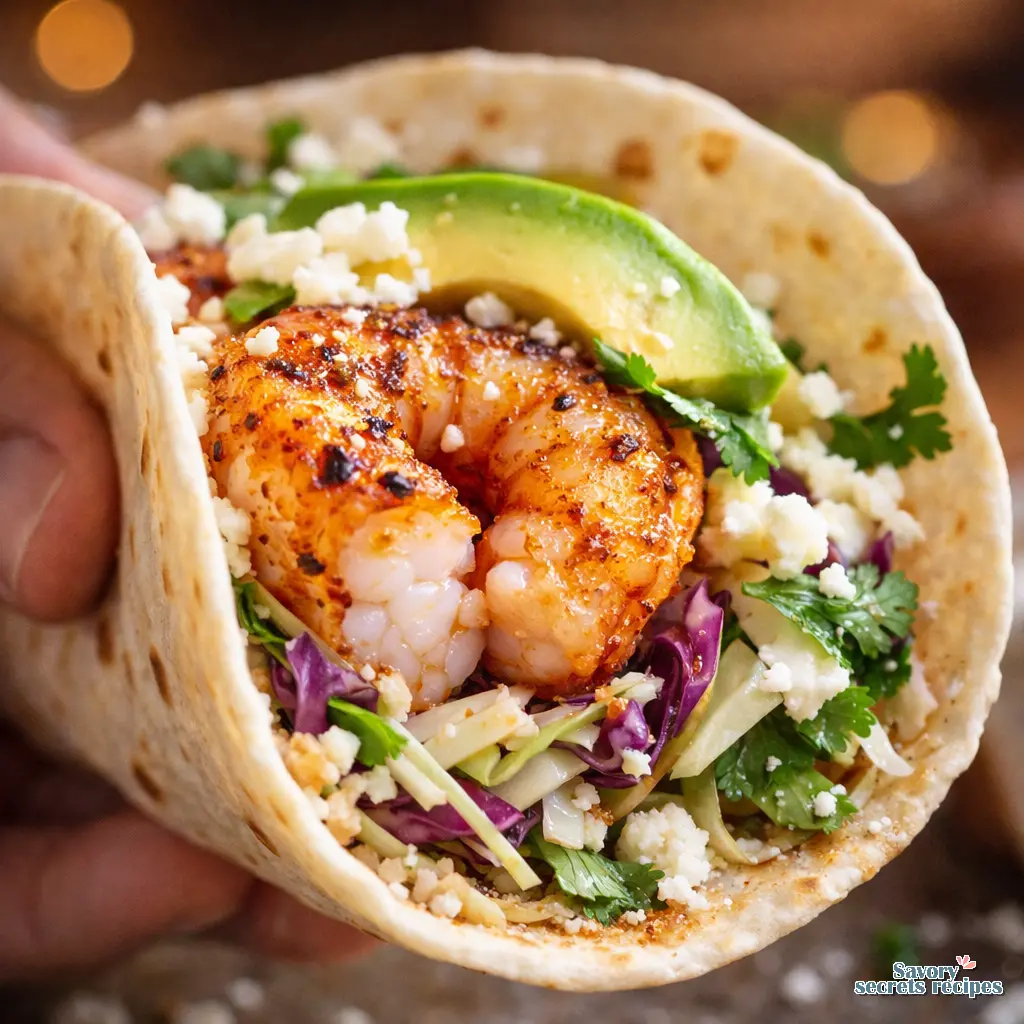
If you have leftovers, they make incredible tacos the next day. Just warm them gently don’t re-cook them! and throw them in a tortilla with some slaw. Perfect.
Storage and Reheating: The Delicate Balance
Seafood is fragile. I treat it like vintage film stock you have to be careful with it. Cooked shrimp will last in the fridge for about 3 days in an airtight container. But the texture changes the longer it sits.
When it comes to reheating, the microwave is the enemy. It will turn your tender shrimp into rubber erasers in ten seconds flat. Instead, heat a skillet over low heat with a tiny splash of water or broth. Add the shrimp and cover the pan for just a minute or two, until they are warmed through. You aren’t cooking them again; you’re just waking them up.
Or, honestly? Eat them cold. Cold shrimp are delicious in a salad or a grain bowl. I often make extra just to have them for lunch the next day. It’s efficient. Having leftover protein is a great excuse to try various already cooked shrimp recipes for a quick lunch.
Frequently Asked Questions
There is something really satisfying about mastering a simple protein. When you take that first buttery bite, and the shrimp has that perfect snap not mushy, not rubbery, just right you realize you don’t need a complicated recipe to make something great. You just need good light, I mean, good ingredients, and a little attention to detail.
Give this a try tonight. It’s faster than delivery, and honestly, it tastes better. If you need more visual inspiration for weeknight meals, check out my Pinterest boards where I collect all my favorite color palettes and recipes.
You’ve got this. Keep it simple, keep it clean.
Reference: Original Source
Can I cook easy shrimp recipes straight from frozen?
Technically, yes, but I don’t recommend it for a sauté. The ice melts and waters down your sauce, and the shrimp steam instead of searing. You lose that beautiful color and flavor. Take the 20 minutes to thaw them in cold water. It’s worth it for the texture alone.
Do I really need to remove the tails?
It’s a personal choice. For a pasta dish or stir-fry, I remove them before cooking so you can just dig in without getting your hands messy. But if I’m serving them as an appetizer to be picked up, I leave the tails on. It makes for a nice handle and looks a bit more elegant on the plate.
Is fresh or frozen shrimp better for this recipe?
Unless you live on the coast and are buying from a boat, frozen is usually “fresher.” Most supermarket shrimp were frozen at sea and thawed at the store. Buying frozen raw shrimp gives you more control over the quality and timing. Plus, I find the texture is often better.
What can I use instead of butter?
If you’re avoiding dairy, a high-quality olive oil works perfectly. You won’t get the milk solids browning, but you’ll get a lovely, fruity flavor. You could also try ghee (clarified butter) if you tolerate it, which gives you that buttery taste with a higher smoke point. Just watch your heat.

3 Responses
This was a lifesaver tonight! I followed your advice and kept a bag of frozen shrimp ready, and it really did come together in under 20 minutes.
I could only find the 31/40 size at my local grocery store today. Should I reduce the cooking time significantly so they don’t get rubbery?
Since those are a bit smaller, I’d definitely recommend reducing the cooking time by a minute or two to keep them tender. Just keep a close eye on the color and texture; you want them to turn perfectly opaque and hold a loose “C” shape!